Flight Planning

Center for Geospatial Analytics at North Carolina State University

Corey White adapted from Justyna Jeziorska and Helena Mitasova

Objectives

  • Describe the four phases of flight planning, from project definition to flight control
  • Apply safety procedures and preflight checklists required under Part 107
  • Plan ground control point placement and relate GCP accuracy to ground sampling distance
  • Set the flight parameters that shape a mapping mission: altitude, overlap, pattern, speed, and lighting
  • Choose a flight planning platform for a given aircraft and project

Where this lecture sits

UAS photogrammetric process: flight planning (highlighted), flight, data processing, data analysis

Four questions to keep asking: What is the aim of the project? What resolution does it need? What do the regulations allow? What will the weather do?

Four phases of flight planning

Flight planning phases: project definition, flight planning, site evaluation, flight control

Project definition

Flight planning phases with project definition highlighted
Decision Driven by
Spatial scale: resolution and extent Project aim, UAS and sensor capabilities, terrain constraints
UAS and sensor Required resolution, area size, budget
Cost, labor, and time Area, number of flights, field crew, processing
Terrain information Existing DEMs, imagery, and local knowledge of the site

Project definition

Flight planning phases with project definition highlighted

Legal constraints

  • Airspace class and any authorization needed (Topic 1)
  • Landowner permission for takeoff, landing, and access
  • Local restrictions on the site

Coordinate system

  • Chosen by the desired coordinate system of the final products
  • Consistent with the coordinate system of the GCP survey
  • Record the horizontal and vertical datum

Decide the coordinate system before the survey: a GCP file without its coordinate system is a list of numbers, not coordinates

Flight planning

Flight planning phases with flight planning highlighted
  • Mission area assessment
  • Planning geometric parameters: altitude, overlap, pattern, and camera angle
  • Choosing a flight planning and flight logging platform
  • Preliminary weather assessment: climate, season, forecasts
  • Creating the flight plan in the chosen software

Placing ground control points

  • A minimum of 5 GCPs is recommended; 5 to 10 are usually enough, even for large projects
  • Use more GCPs when the topography is complex
  • Distribute them evenly across the area
  • Do not place GCPs exactly at the edges of the area
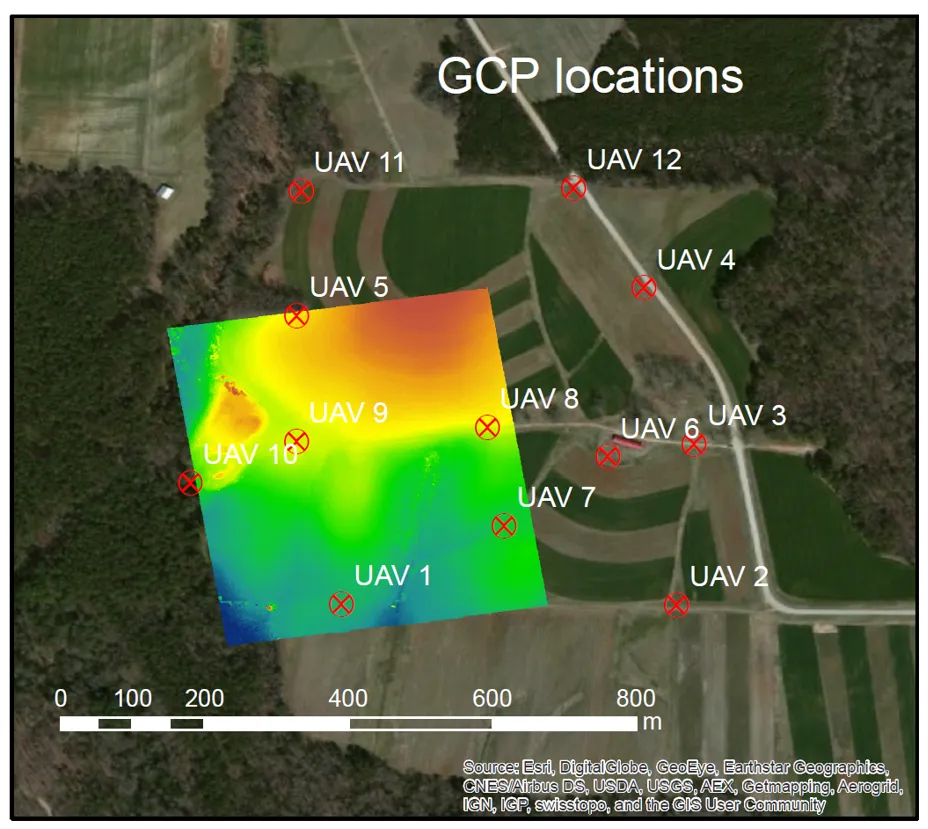
Map of twelve GCP locations spread across the Lake Wheeler fields around a UAS elevation model

Surveying the GCPs

Before measuring the GCP coordinates, define:

  • The GCP coordinate system
  • The GCP accuracy the project needs
  • The survey equipment: RTK GNSS rover, total station, or handheld GPS

Target size: 5 to 10 times the GSD, so the center is identifiable on the photos
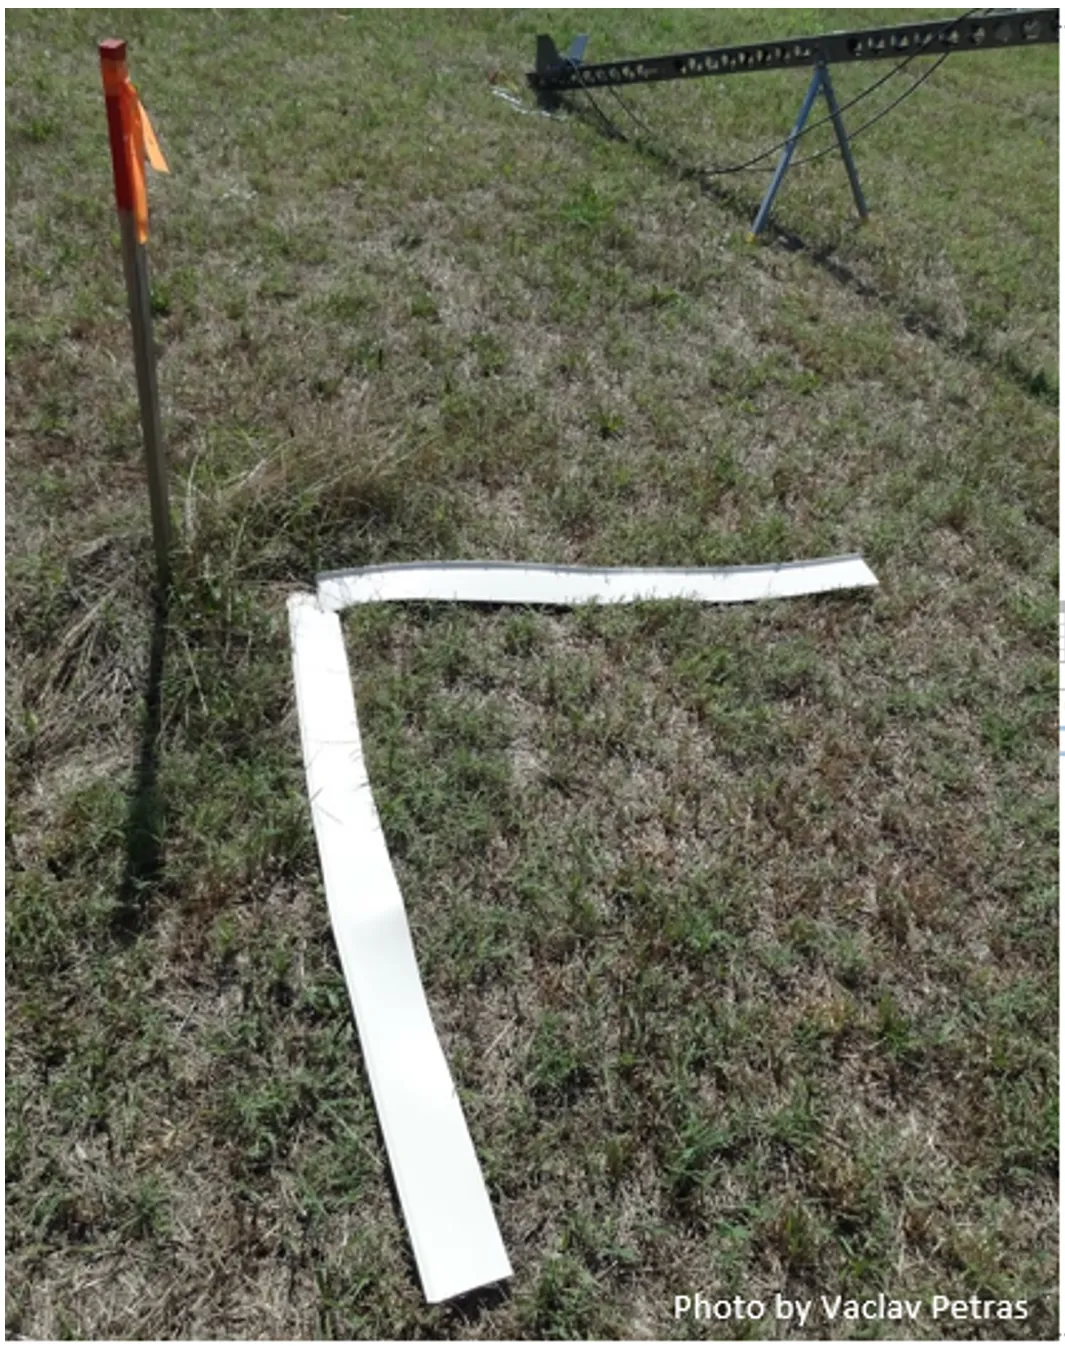
An L-shaped white GCP target on grass next to a survey stake with orange flagging

Ground sampling distance

Distance between two consecutive pixel centers measured on the ground:

\[ \text{GSD} = \frac{H \times S_w}{f \times I_w} \]

Symbol Meaning
\(H\) Flight altitude above ground level, AGL (m)
\(S_w\) Sensor width (mm)
\(f\) Focal length (mm)
\(I_w\) Image width (pixels)

Larger GSD means lower spatial resolution; smaller GSD means higher spatial resolution
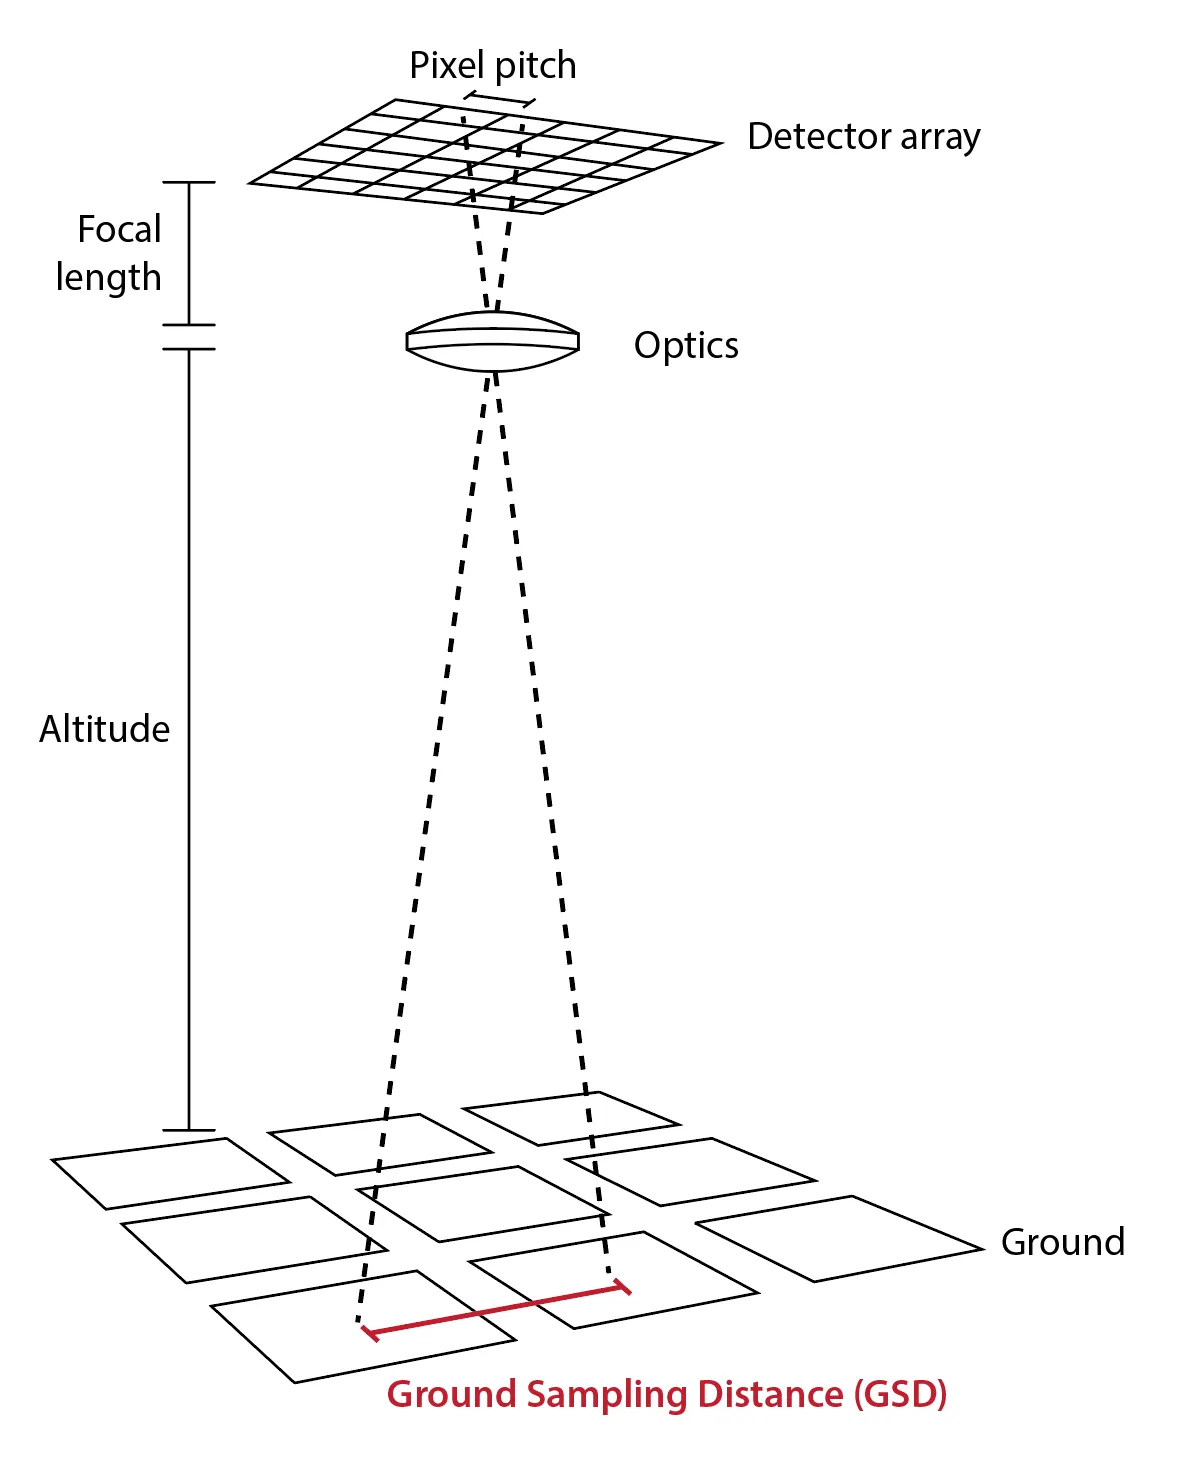
Diagram of a detector array, lens, and ground showing how focal length and altitude set the ground sampling distance

GCP accuracy and GSD

Requirement Rule of thumb
GCP target size 5 to 10 times the GSD
GCP survey accuracy Better than the accuracy you need in the products; finer than 0.1 times the GSD is wasted, because the target cannot be marked on the image more precisely than that
Accuracy of the final products Sets the survey accuracy and the GSD, and so the altitude, in the first place

Work backwards: required product accuracy sets the survey accuracy and the GSD, the GSD sets the altitude and the target size

Site evaluation

Flight planning phases with site evaluation highlighted
  • Terrain check: high obstacles in the takeoff, mission, landing, and alternative landing locations
  • Ask the locals about possible air traffic or ground activities
  • Weather check: temperature affects battery life, and most UAS cannot operate in rain
  • Use checklists, do not rely on your memory

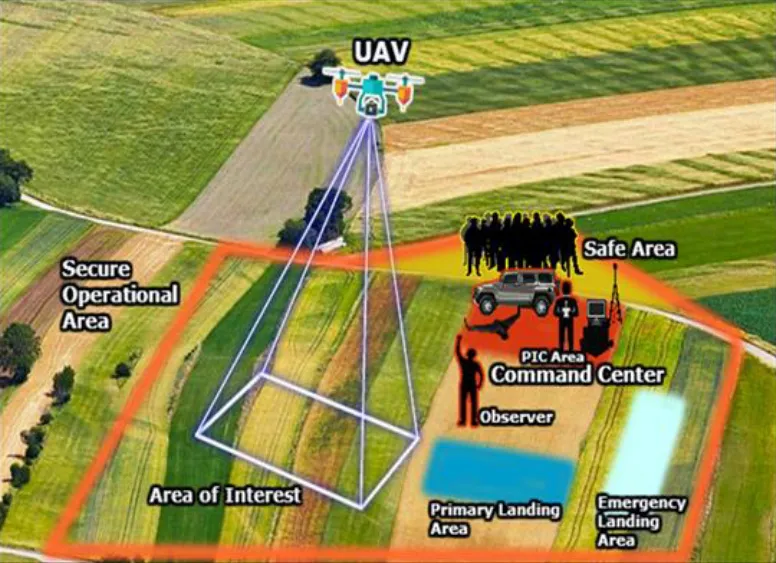
Site layout

Aerial view of a field marked with the secure operational area, area of interest, command center, observer, safe area, and primary and emergency landing areas

Preflight inspection

  • A preflight inspection is required under Part 107.49: weather, airspace, people and property on the surface, crew briefing, control links, power, and payload
  • The rule lists what to check, not a checklist; the FAA advisory circular AC 107-2 recommends the Remote Pilot in Command (RPIC) follow the manufacturer’s checklist, or develop one when none exists
  • Checklists are usually built into the flight software or available from the vendor
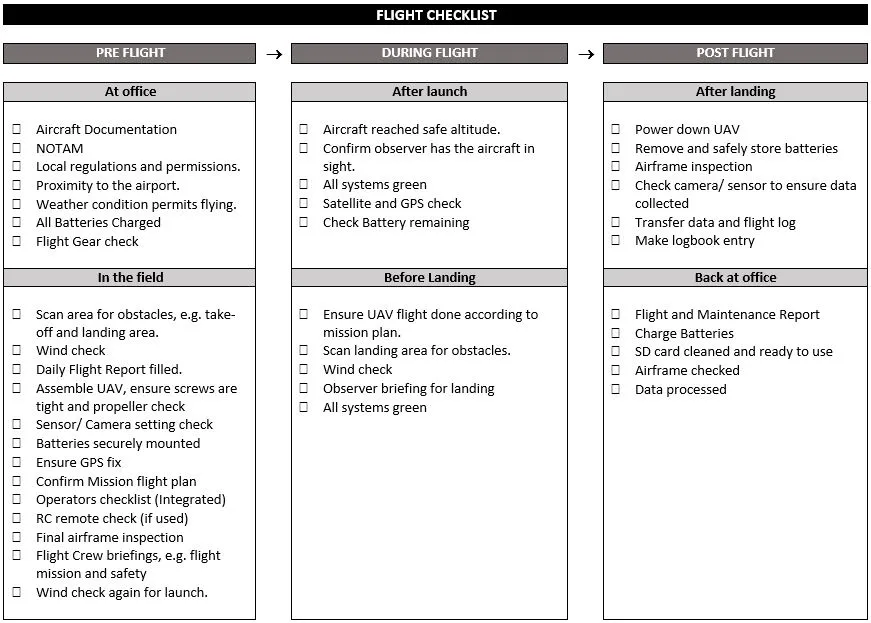
Flight checklist with pre-flight, during-flight, and post-flight columns split into office, field, launch, landing, and post-landing tasks

North Carolina: no separate N.C. permit is required for commercial and government operators since December 1, 2024

Flight control

Flight planning phases with flight control highlighted
  • The RPIC should launch, operate, and recover from preset locations so the aircraft flies according to the mission plan
  • Observation locations should be selected for maximum line of sight throughout the planned flight area (Part 107.31)
  • On any failure or loss of visual contact, command the aircraft back to the recovery location or use the built-in fail-safe features

Visual Line of Sight (VLOS): the flight crew must have a clear view of the aircraft at all times, without aids other than corrective lenses

Flight crew roles

Flight planning phases with flight control highlighted
Role Responsibility
RPIC, Remote Pilot in Command Holds the certificate; responsible for the operation and the final say
PMC, Person Manipulating the Controls Flies the aircraft under the direct supervision of the RPIC
VO, Visual Observer Watches the aircraft and the airspace; optional but recommended

Part 107.33: the RPIC, the person manipulating the controls, and any visual observer must be able to communicate with each other at all times

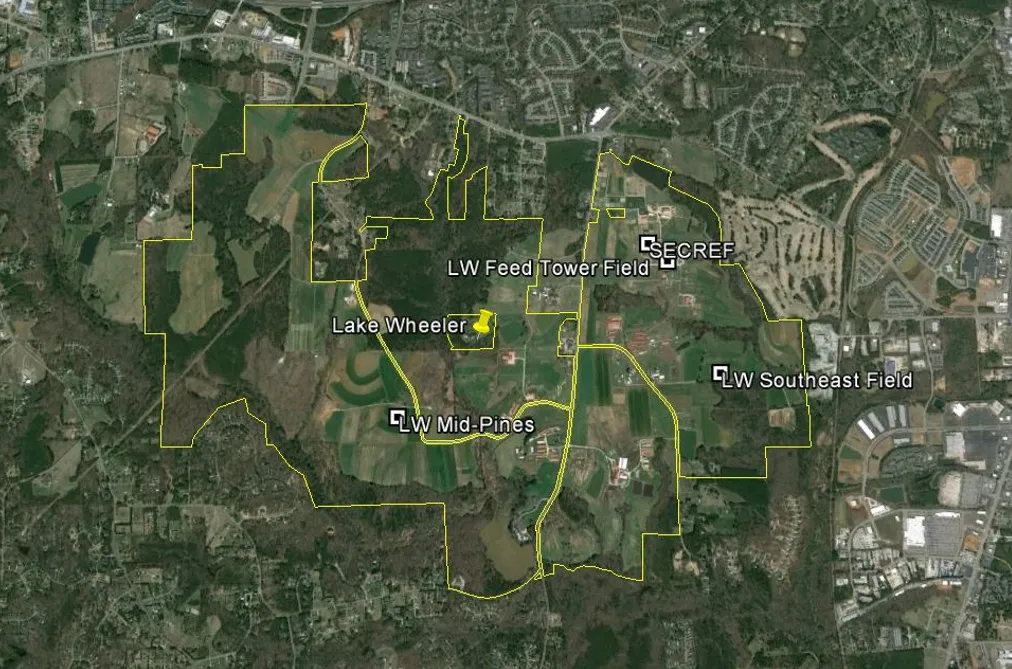
Lake Wheeler

Lake Wheeler Road Field Laboratory

Satellite view of the Lake Wheeler Road Field Laboratory outlined in yellow, with the Mid Pines, Feed Tower, and Southeast fields and SECREF labeled

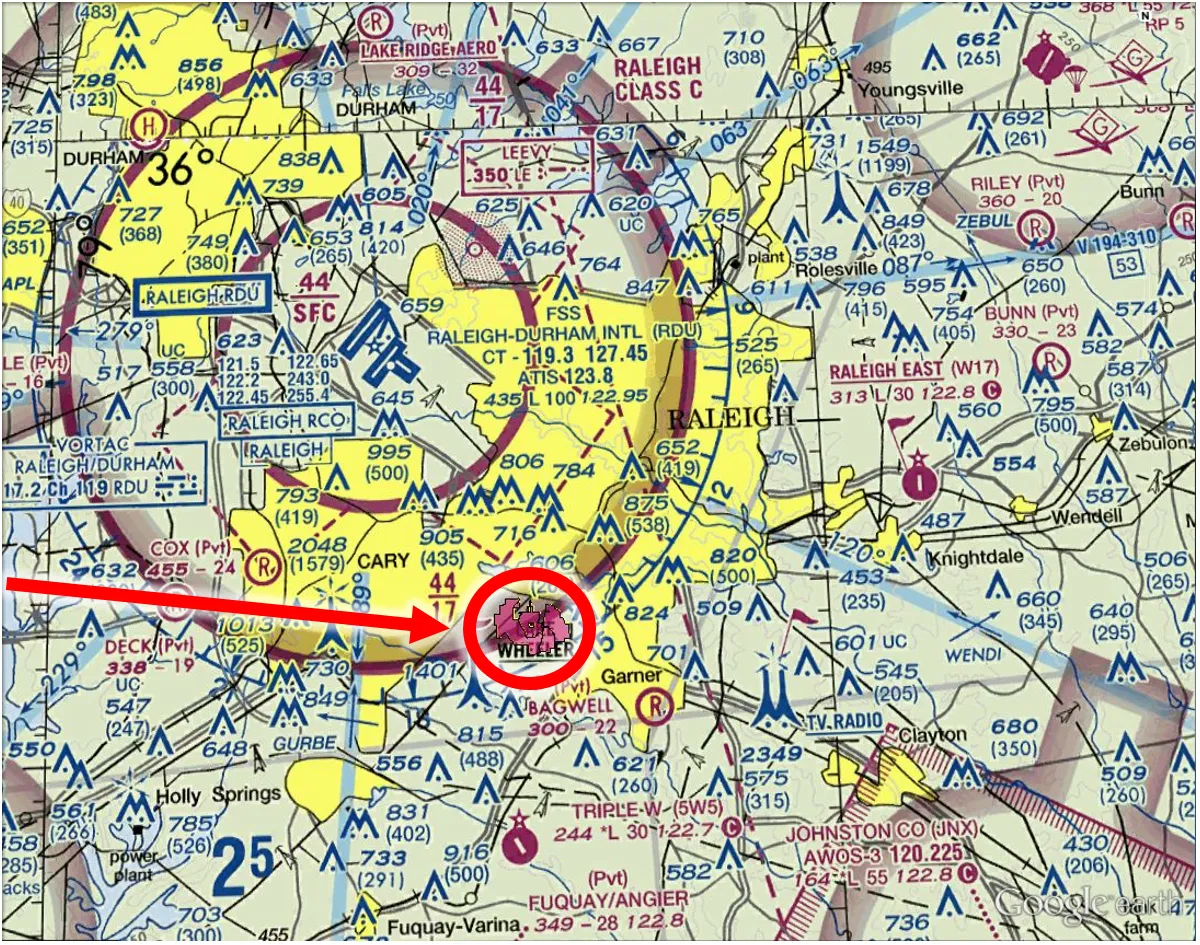
Lake Wheeler on the sectional chart

Raleigh sectional aeronautical chart with Lake Wheeler circled inside the RDU Class C airspace shelf

Planning the mapping flight

Flight planning software

  • Multiple platforms are available; some are dedicated to a specific UAS and sold with the system
Commercial Open source
DroneDeploy QGroundControl
Pix4Dcapture Pro Mission Planner
DJI GS PRO
UgCS
DroneLink

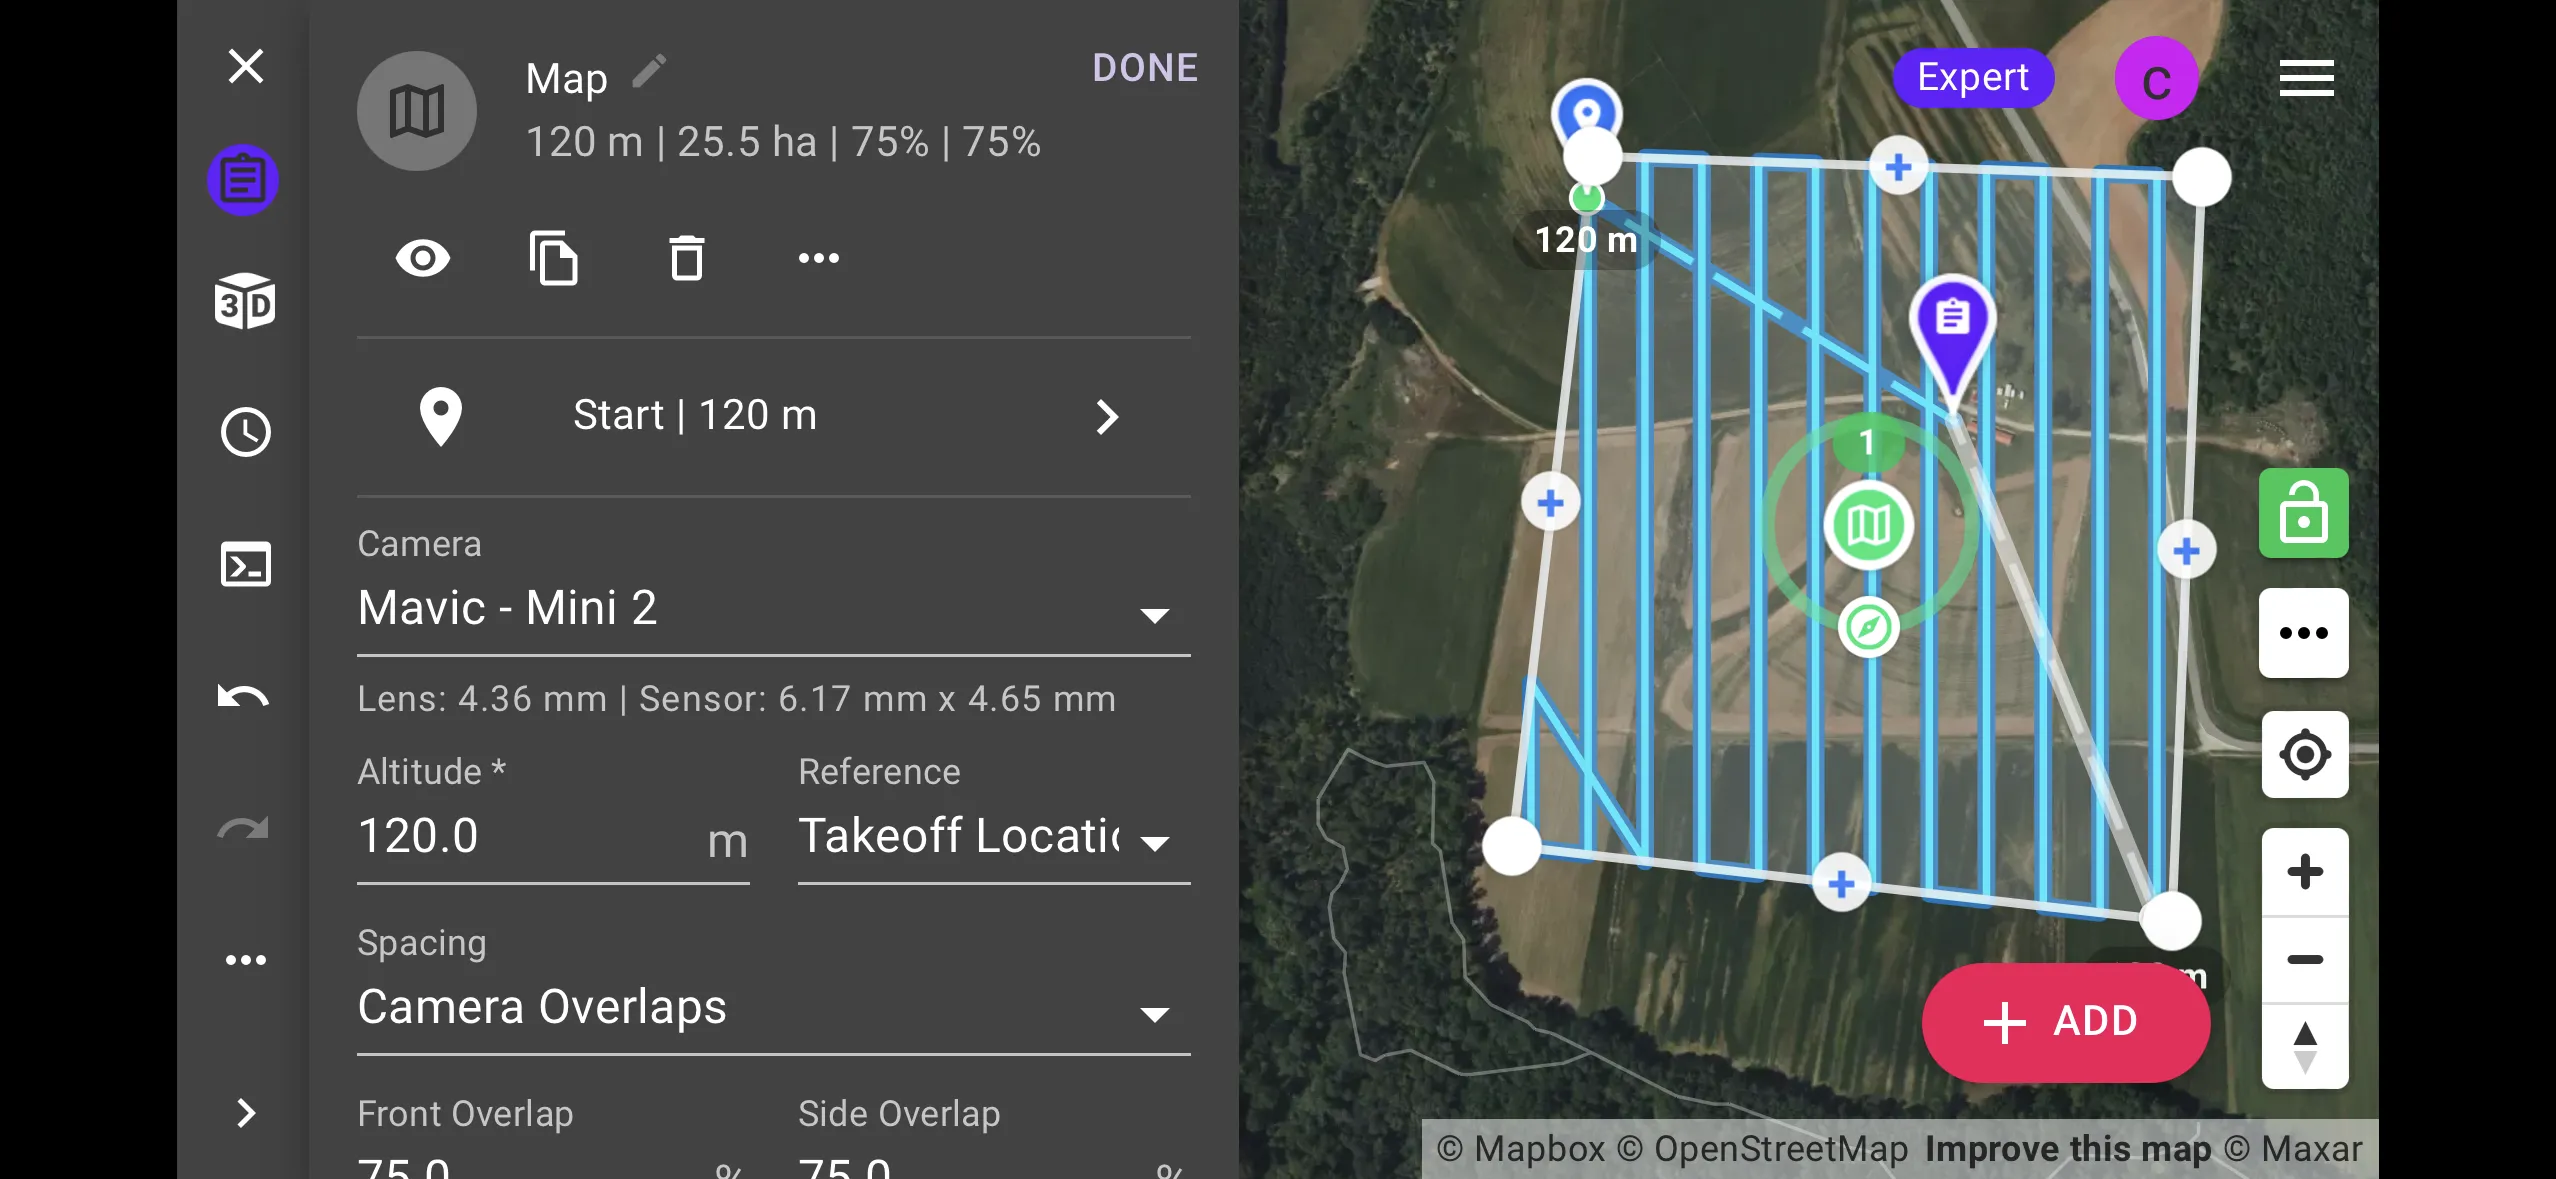
What they share: draw the area, set altitude and overlap, and the app computes the flight lines, photo count, and flight time

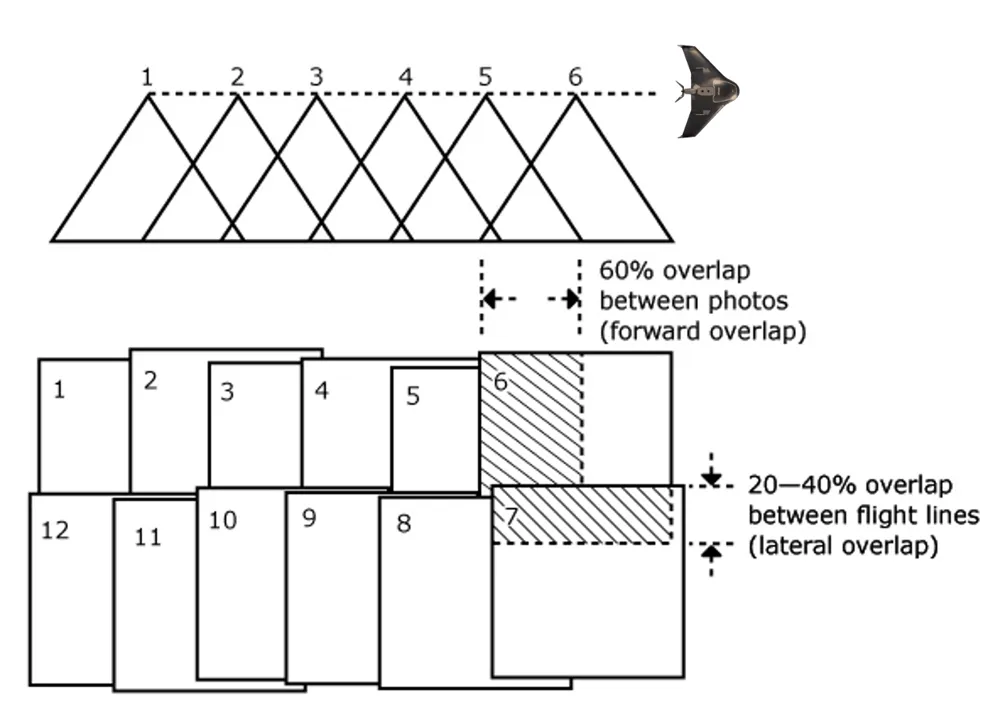
Overlap geometry

Diagram of forward overlap between consecutive photos along a flight line and lateral overlap between flight lines

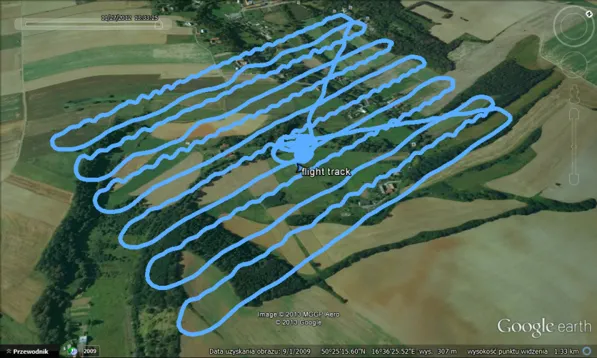
GNSS flight track of a lawnmower survey pattern over farmland in Google Earth

  • Forward overlap: between consecutive photos on a flight line
  • Side (lateral) overlap: between adjacent flight lines
  • The flight track on the right is the lawnmower pattern the plan produces

Location and camera

Location

  • Fly a larger extent than you need
  • Think about the area you need for analysis, plus a buffer
  • Edge accuracy is always worse than the middle

Camera settings

General camera settings are usually fine. Optional:

Setting Value
Mechanical shutter On
Focus Infinity
Shutter priority 1/800 s
Aspect ratio 3:2

Camera angle

Nadir (straight down) Gently oblique Oblique (pitched)
Gimbal pitch -90 degrees -55 to -75 degrees, 15 to 35 degrees off nadir About -45 degrees
Best for Most mapping: orthomosaics and DSMs A supplemental pass over a nadir block; rough or high-relief terrain Buildings, facades, 3D models
Trade-off Simple, efficient Stronger self-calibration, less doming; more photos Full 3D detail; more photos and flight time, weaker orthomosaic

Combine them: a nadir grid gives the map, an inclined pass fixes the camera model, and a steep oblique pass adds the facades

Altitude

  • Altitude above ground level (AGL) sets the GSD and the flight path; typical mapping altitude is 70 m to 120 m AGL
  • Higher altitude: fewer lines, shorter flight, coarser GSD
  • Use a terrain-aware flight path on sloping sites so AGL stays constant
  • Stay under the ceiling of the airspace authorization
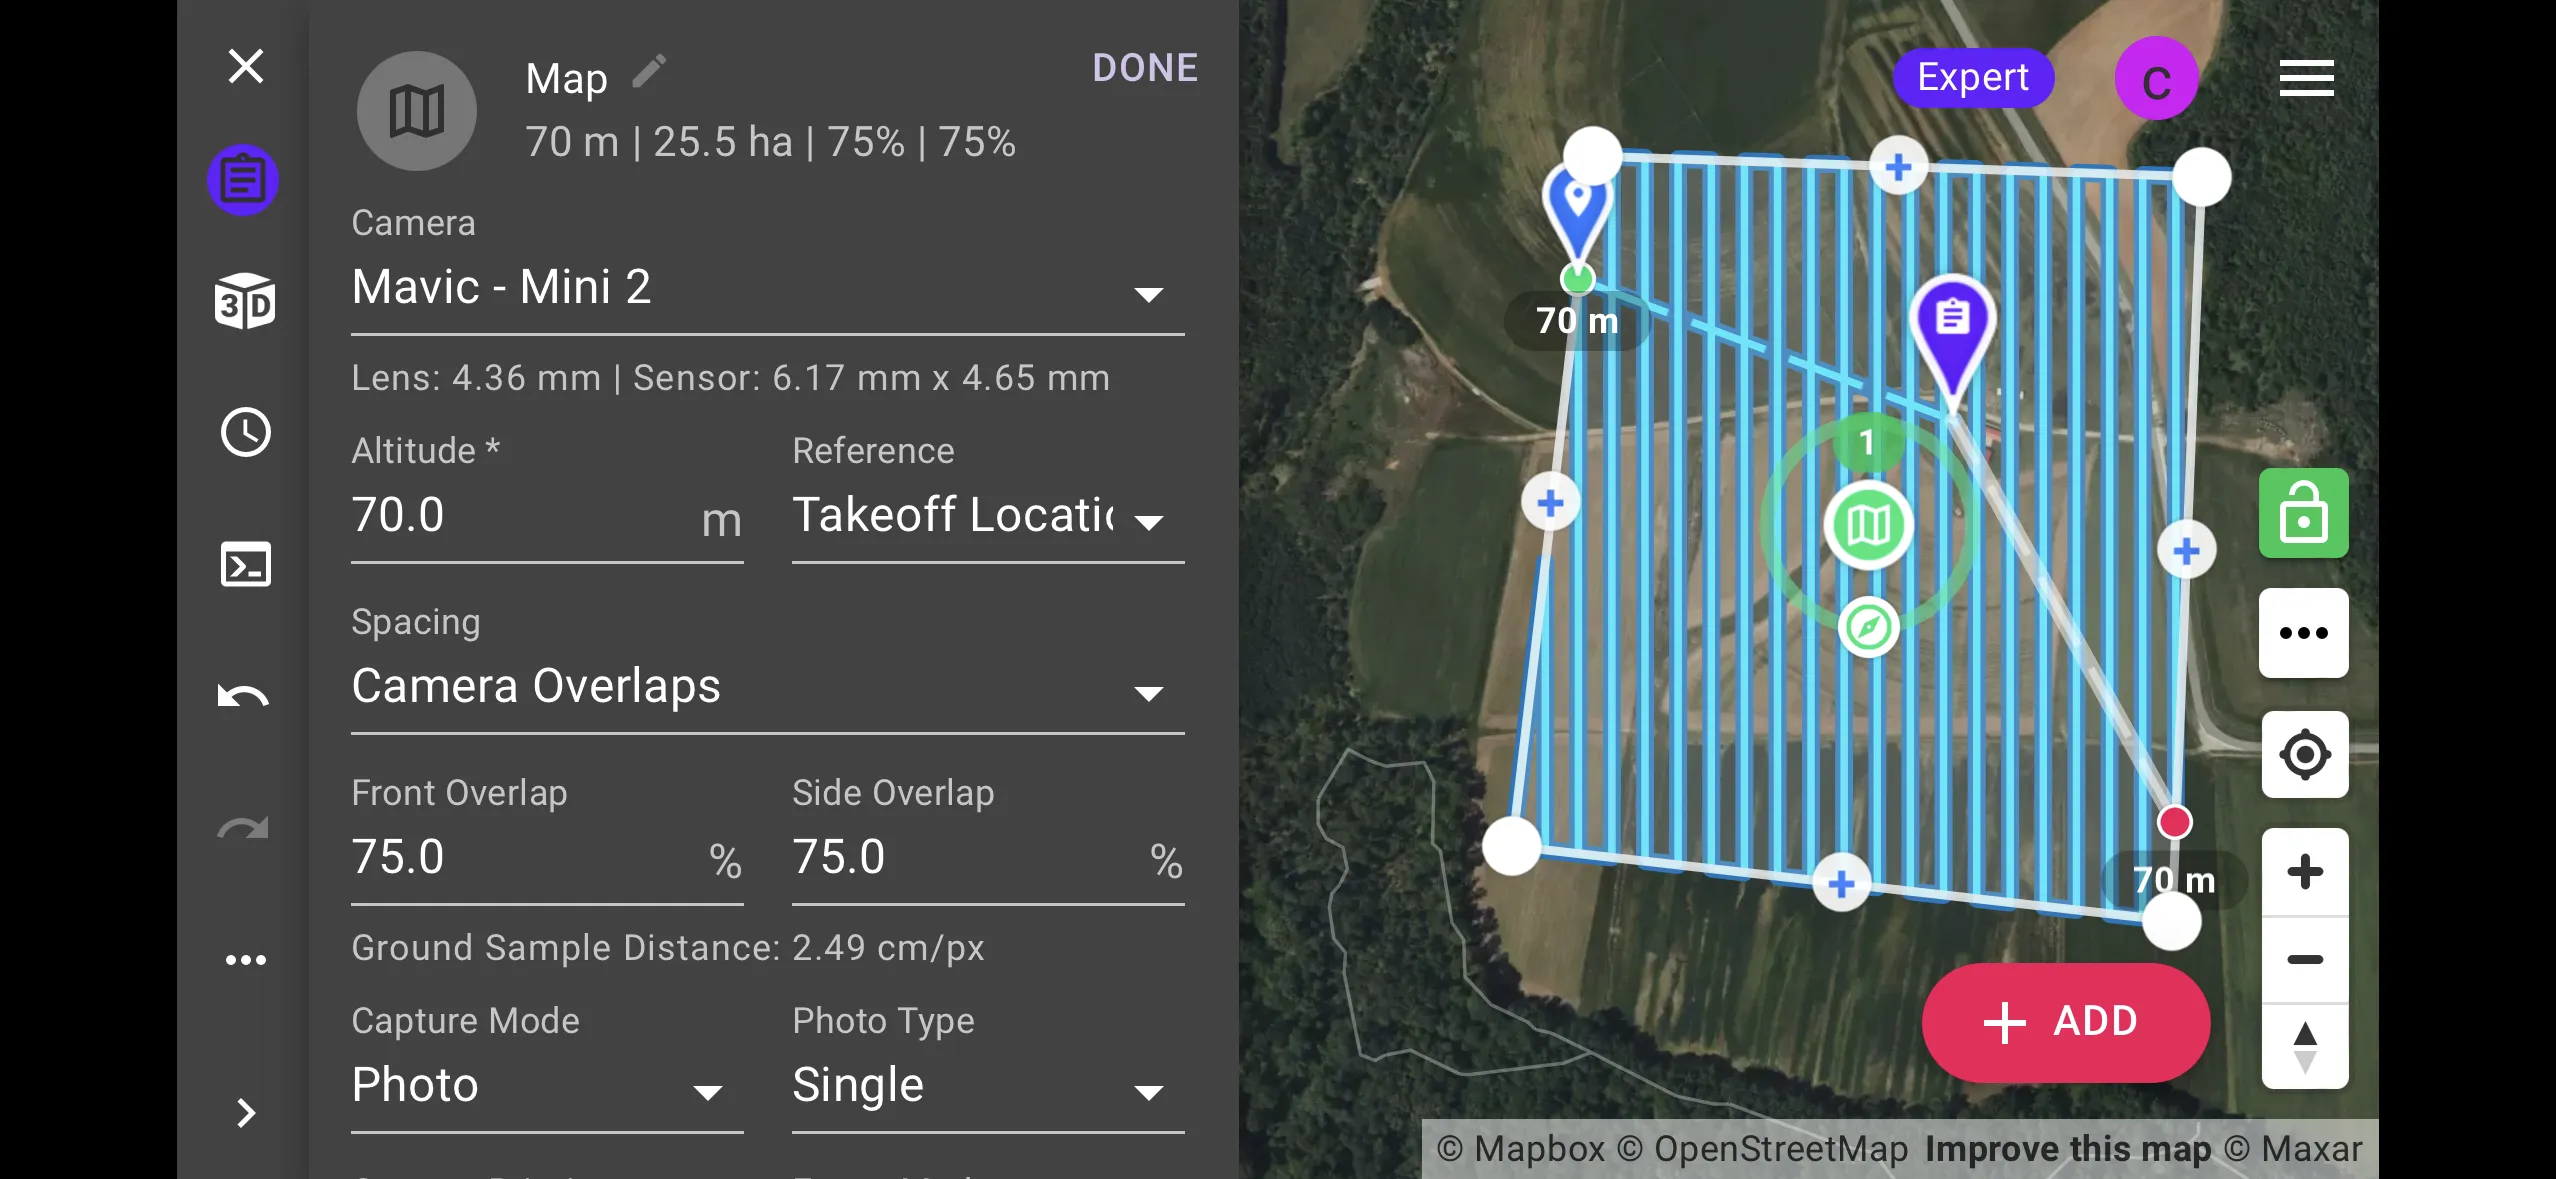
DroneLink flight plan at 70 m altitude with dense flight lines over the Lake Wheeler field

Altitude 70 m, 75% overlap

DroneLink flight plan at 120 m altitude with fewer flight lines over the same field

Altitude 120 m, 75% overlap

Flight patterns

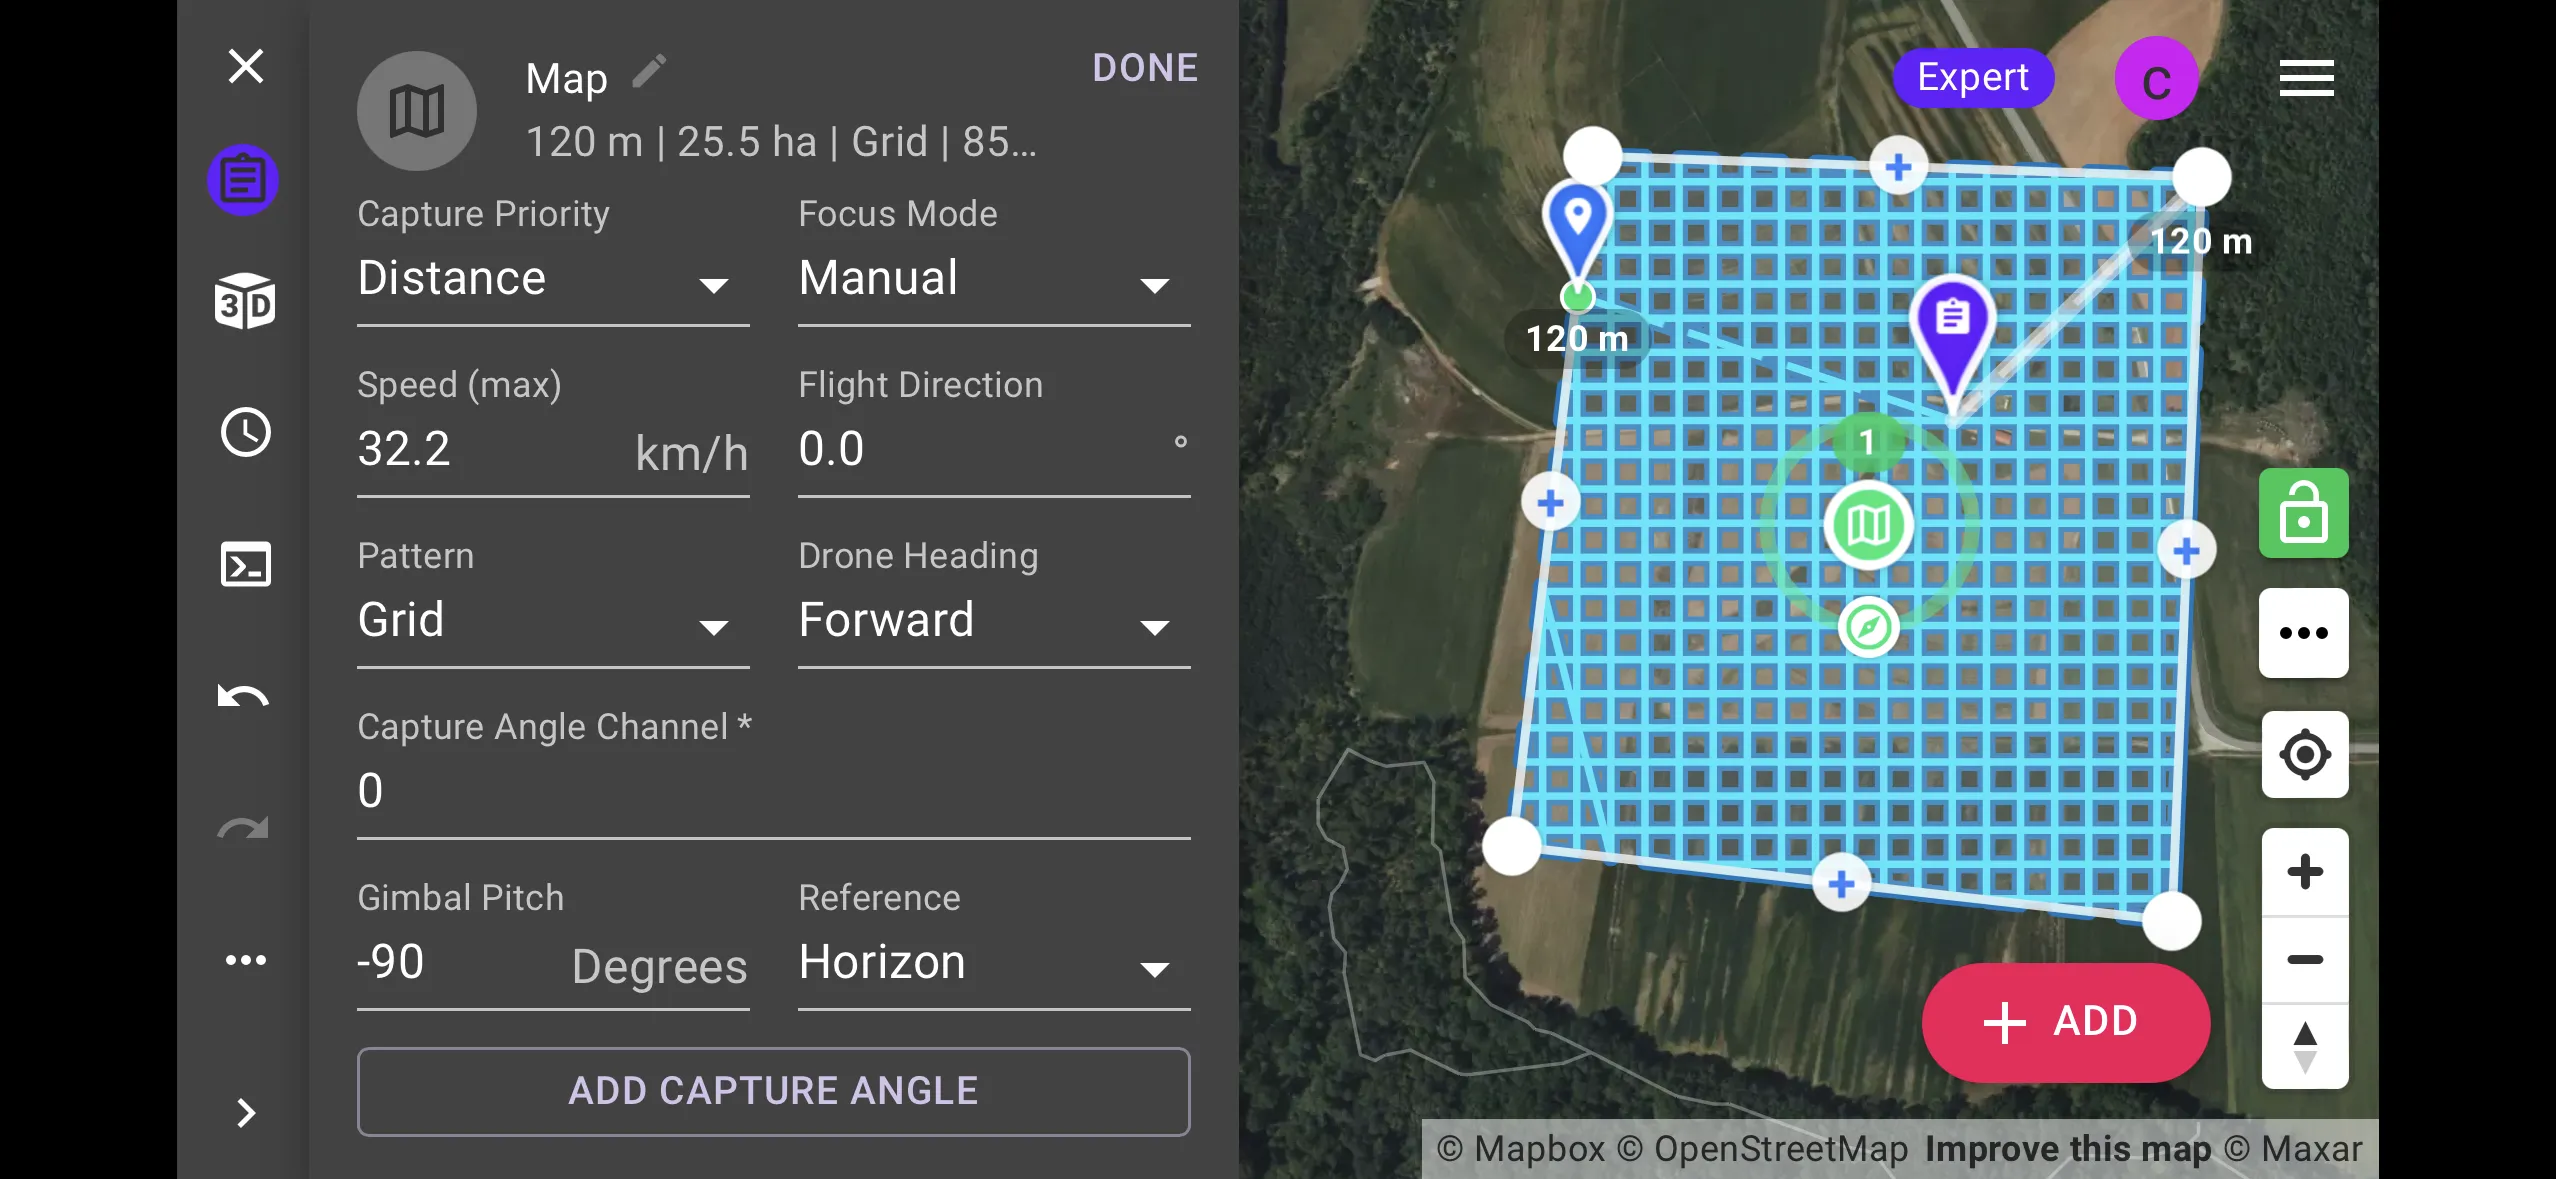
DroneLink flight plan with parallel lawnmower flight lines

Normal (lawnmower)
  • One set of parallel lines
  • Standard for orthomosaics and DSMs

DroneLink flight plan with a crosshatch grid of flight lines

Crosshatch (grid)
  • Two perpendicular sets of lines
  • More detail and stronger geometry, longer flight time

Overlap

Minimum Recommended for SfM
Forward 60% 75 to 85%
Side 40% 60 to 80%
  • Homogeneous terrain (crops, sand, water) needs more overlap: fewer features to match
  • More overlap means more photos, longer flights, and longer processing
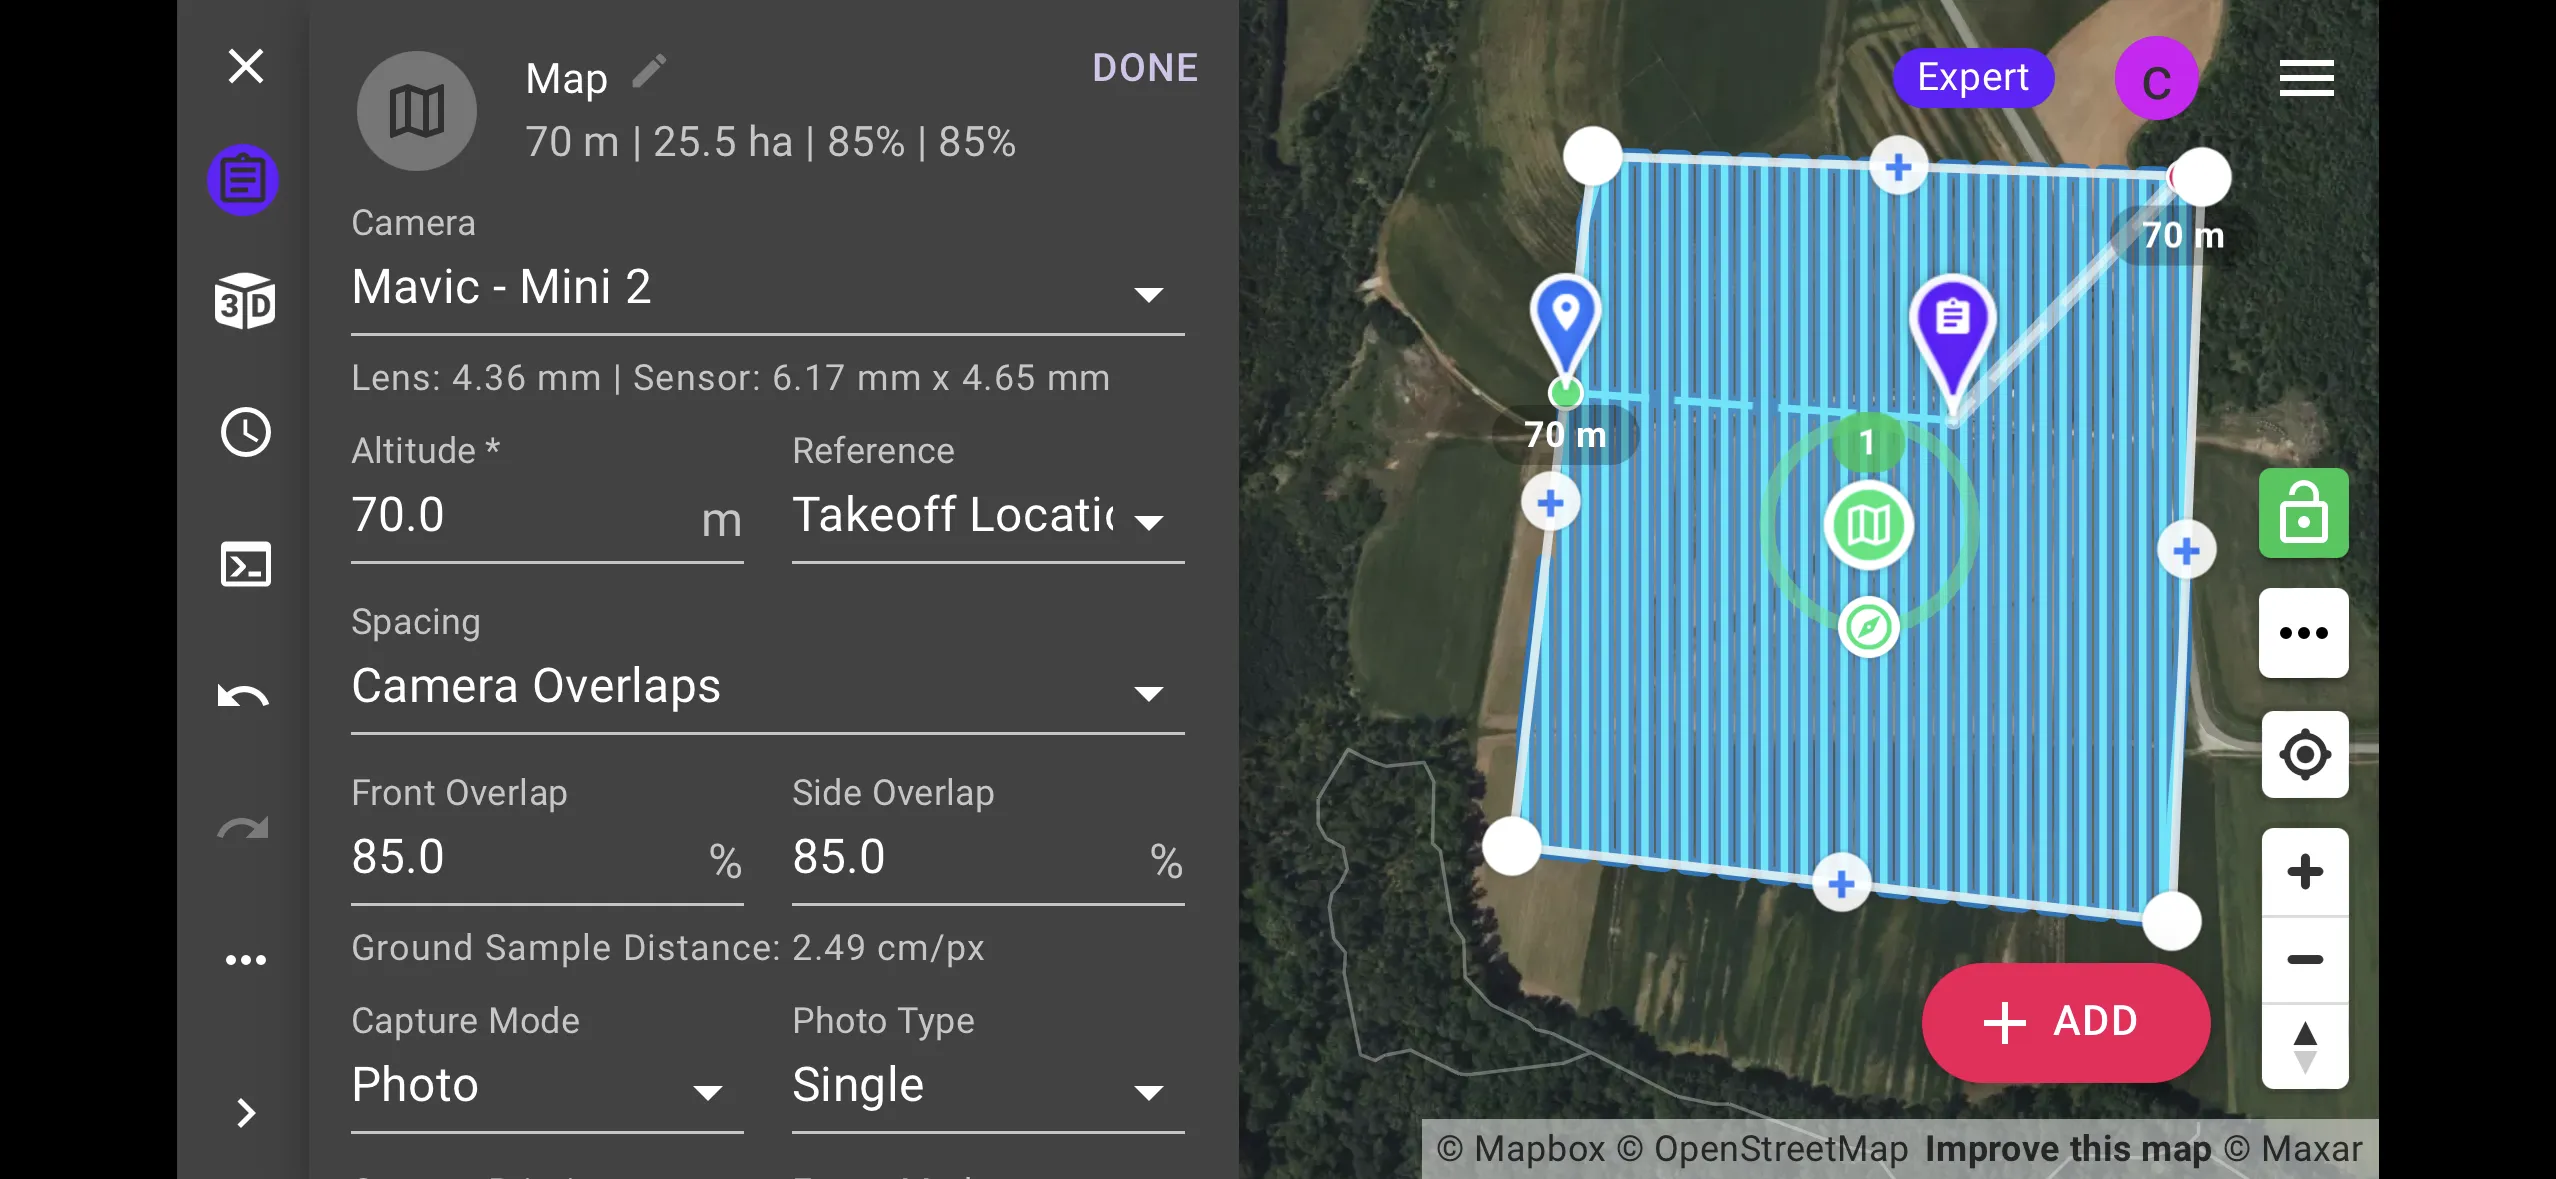
DroneLink flight plan at 70 m with 75 percent front and side overlap

75% front and side overlap

DroneLink flight plan at 70 m with 85 percent front and side overlap, showing denser flight lines

85% front and side overlap

Question: how will overlap impact your flight path?

Drone speed

  • Typical mapping speed: about 30 km/h, set by the app from altitude and forward overlap
  • The limit is the camera, not the aircraft
Factor Effect on speed
Lighting Low light forces a slower shutter and a slower flight
Camera shutter Faster shutter allows faster flight
Altitude Higher altitude allows faster flight for the same blur
Motion blur Blur is speed times exposure time; keep it under one GSD, under half a GSD for precision work

Lighting

Conditions Effect
Overcast, bright Best: even illumination, no hard shadows
Noon Shortest shadows on a clear day
Partly cloudy Exposure changes between photos; avoid if you can
Low sun Long shadows and glare; avoid

Avoid shadows: shadows move between photos and between flights, and they show up as seams in the orthomosaic and as noise in the DSM

Wrap-up

Assignment 3A: Terrain analysis of the flight site using GIS tools, a flight plan analysis for Lake Wheeler in GRASS

Next: the UAS flight at Lake Wheeler on Wednesday; read the GNSS field protocol before the trip. Lecture 3B covers ground control, checkpoints, and accuracy