Laboratory experiment: 3D reconstruction from multiple photos
Perform an experiment to investigate impact of the number and orientation of photos, light, as well as shape and features of a photographed object on its 3D reconstruction from multiple overlapping imagery.Select an object in your office, at home or outside, take multiple overlapping images of this object with your camera and create its 3D digital model using an appropriate software. Make sure that you do not change the zoom during the capture (unless you want to test what impact it would have). You can also compare the models derived from a high end digital camera and a smart phone.
Take the photos from various locations and place features on the physical model to explore the best approach for obtaining a model with minimal distortions. Use any suitable software for example: Colmap (see below), ReCap (Windows only) 30-days free trial is available and students can get the software for free for 3 years. Regard3D (Windows and Mac) - free and open source software. You can also use Agisoft Metashape (which we will be using later for aerial imagery processing).
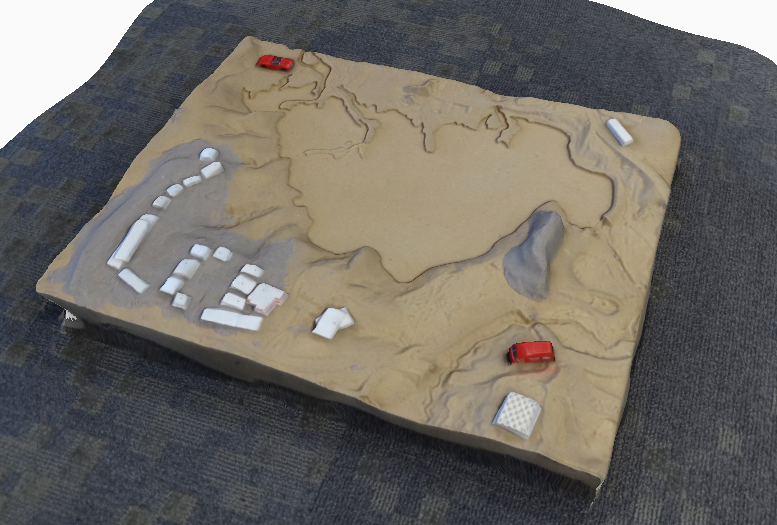
Example 3D model obtained from 20 photos using catch123 from Autodesk (this software has been discontinued and Autodesk replaced it with ReCap)
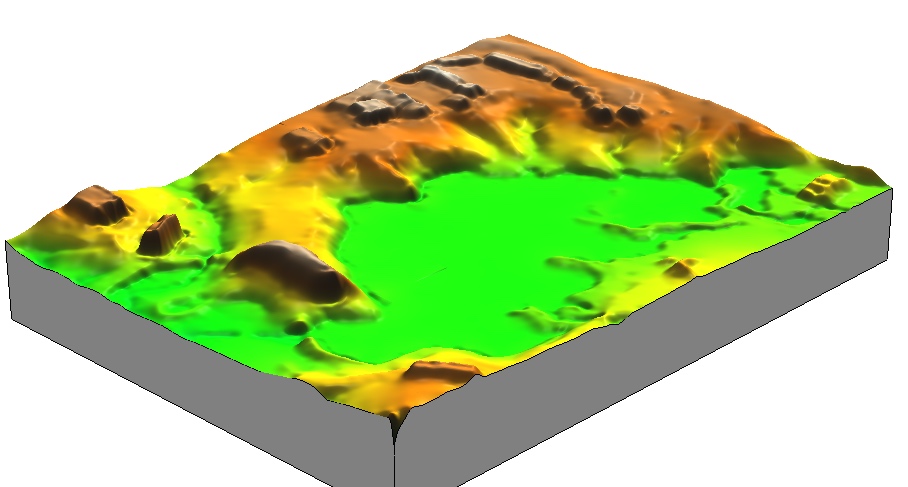
DEM interpolated in GIS from the point cloud exported from 123D Catch
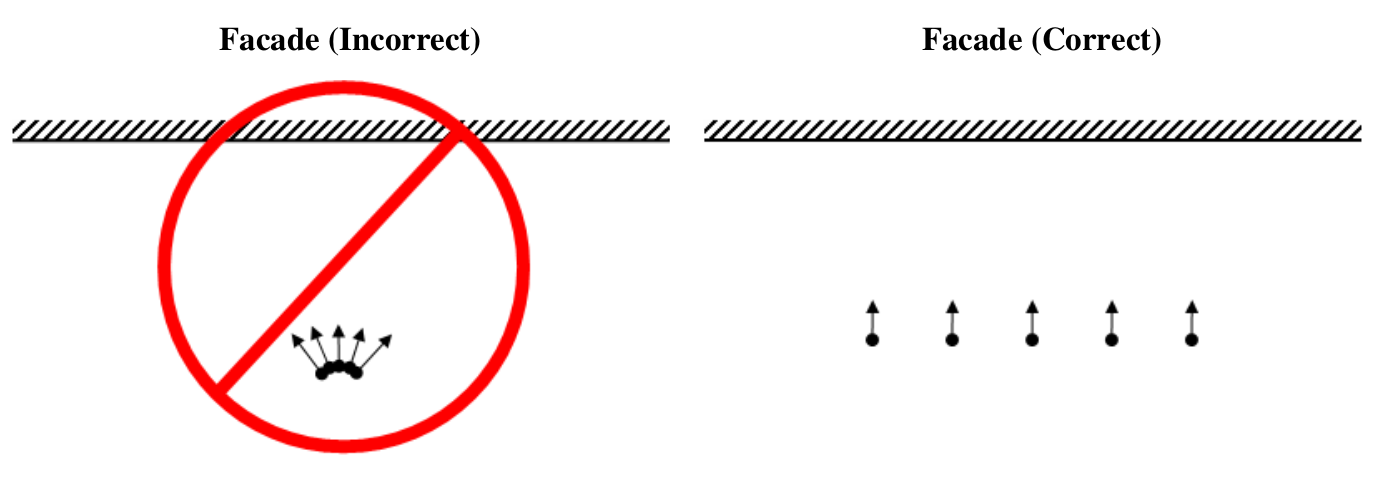
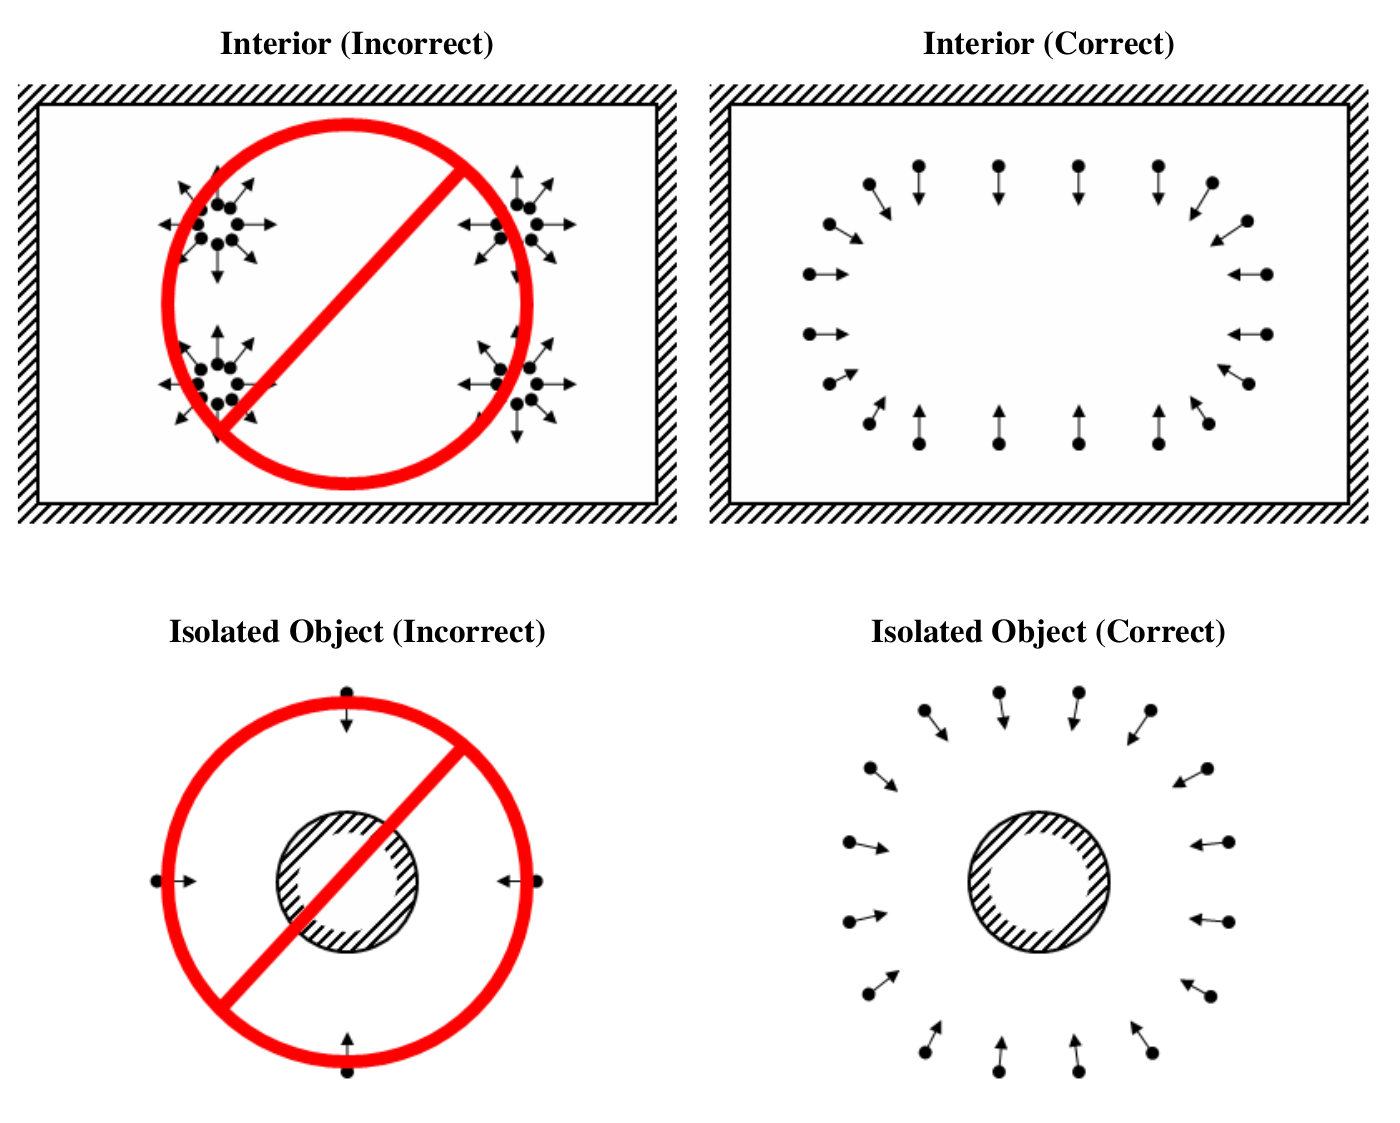
Photo capturing guidelines
Source: Agisoft Photoscan Professional User Manual, modified
- Use a digital camera with reasonably high resolution (5 MPix or more);
- Avoid ultra-wide angle and fisheye lenses;
- Fixed lenses are preferred. If zoom lenses are used - focal length should be set either to maximal or to minimal value during the entire shooting session for more stable results;
- ISO should be set to the lowest value, otherwise high ISO values will induce additional noise to images;
- It is important to capture sharp, not blurred photos;
- Avoid not textured, shiny, highly reflective or transparent objects;
- Avoid unwanted foregrounds;
- Avoid moving objects within the scene to be reconstructed;
- Avoid absolutely flat objects or scenes;
- Number of photos: more than required is better than not enough;
- Good lighting is required to achieve better quality of the results, yet blinks should be avoided. It is recommended to remove sources of light from camera fields of view. Avoid using flash;
- Each photo should effectively use the frame size: object of interest should take up the maximum area. In some cases portrait camera orientation should be used;
- Do not try to place full object in the image frame, if some parts are missing it is not a problem providing that these parts appear on other images.
Advice on appropriate capturing scenarios:
COLMAP
COLMAP is a general-purpose Structure-from-Motion (SfM) and Multi-View Stereo (MVS) pipeline with a graphical and command-line interface. COLMAP is open source (GNU GPL) and can be installed on all major platforms.Binaries can be downloaded from COLMAP website. Note: Dense reconstruction step requires NVIDIA graphics card with CUDA installed. Depending on your computer configuration, install binaries with or without CUDA. Once downloaded, unzip and run COLMAP.bat (on Windows). This should start COLMAP's graphical user interface.
In this video tutorial (no audio) we upload around 20 images of a scaled physical model to a folder and run all steps of the reconstruction pipeline. Notice we can inspect keypoints, matches and links between cameras and reconstructed points.
Note 1: If you don't have CUDA, you need to stop before dense recontruction step.
Note 2: If you have CUDA, stero reconstruction can crash COLMAP, which is due to so called GPU timeouts;
More information can be found here